11.8.14
2014 Mid-year Update!
2014 ... Still at it! Do people blog still nowadays, really?! I guess in this fast-paced age of digital web content -- it's like twitter, youtube, and vimeo.
Please feel free to view my latest animation reel , by clicking here.
3.9.09
Badly Taken Photo
17.4.09
13.4.09
Here Comes The Sun
Presenting...a project I've been working on, somewhere in a small town (downtown) Sunnyvale, California. This was rather a huge undertaking in a span of almost 3 months. The model itself composed of nearly detailed buildings in 6 blocks, altogether with animated cars and people. It's great that the team managed to pull-thru. The project required creating Animation sequences and some still perspectives. Some of which can be seen here.
If there's one part about this project, that I'd like to touch on later - it would be procedural mapping. This project had a dozen textures and maps, which was rather overwhelming. So I figured, to cut-down on it and make it 'easier' by using procedural texture mapping. Anyway, I'll write more about it in detail in my later posts. Here's a 'snapshot' along a streetview for now.
Above is a view I composed myself,
all in 3D with some Photoshop enhancement.
9.4.08
More than Panoramic

Tech Notes:
Modeled with 3D Max 7.0
Rendered with Vray
Post-Processed in Photoshop CS
18.1.08
News of Old for the New
Back again for 2008. Last year was a very intense year for CG work, especially the last month. And things are still on the roll. Major things in the making still. Hence, the reason why I haven't been able to post much on this blog. However, for posting's sake, Autodesk has recently released some news regarding some stuff about company I work in (Lights & Shadows). Something worth sharing...

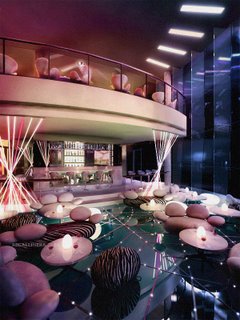
Bar counter at some resort development at Koh Samui
Press release as seen here.
Just to note, neither I or any of us in LNS did not pick the above images. I'd say there were other "impressive" works to choose from as well. So it was quite a suprise, for at least the 1st image, to make it. To add, though I was mainly involved in these, I have still to commend a few of my colleagues who have played a part on these as well.
1st Image: 3D modelling was mostly done by me, including Photoshop enhancement. I'd say, the fun part of working on this was creating my own library of bottled liquors. It was more of collecting actual labels and replicating the bottle's shape in 3D. In a way, I got educated in the art of drinking wine and mixing cocktails.
2nd Image: This was a very tough thing to make. Again, major involvement in 3D on my end. The main building was rather typically modelled. And I had to copy the existing colonial house in which the new development was designed around it as well. What i found difficult was making the land contour / slopes. Literally done via edit-poly...pushing and pulling vertices / adding polygons as I traced along the plan. And a major role, was the 2D enhancement my our DI Artist. Without the surrounding and trees / colour adjustments...it just wouldn't have looked right.
Other Credits & Tech Notes:
Chua T.Y. (Main Adviser...MasterChief)
Additional 3D model in Max / Support (for The Capella): Xiao Lei, Chua T.Y.
2D DI in Photoshop (for The Capella): Alice Lee
1.6.07
Another Old School Technique For A New View


Another more detailed & similar technique can be found here.
Modeled with 3DS Max v8.0
Rendered with mostly Vray
Ambient Occlusion pass was rendered with Mental Ray
Post processed in Photoshop
18.5.07
Building A City In A Day
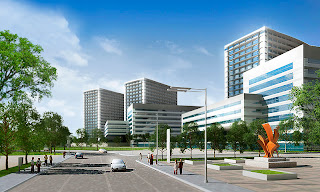
Now here's where the tricky part comes in. As the "designer," I had to come up with something that the Architects would like, or at least match their style. It would have been easier had there been a rough sketch from them. But since there wasn't any, I just had to create something, based on what I had at the moment (current books, and some rough info from the Architects). Another difficult aspect was coming up with closer views, rather than just Aerial views, which also mean higher level of details.
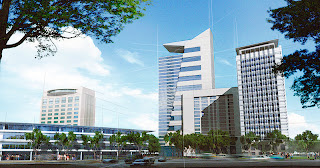
Do note that, I've been sort of out of touch with my Architectural designing. It was rather a fun exercise as well. It ain't finished yet. And the images herein are just drafts, and not necessarily what the Architects have in mind. So it could be totally scrapped as well in the end. Here's some of the closer views.

Forget the buildings...actually for this view, I sorta became
more engrossed with the sculpture (my own design).

2.4.07
La Viva...Vivo City!
For that mentioned project, we had to work closely with the ad agency who already had conceptualized the look. It was also a different kind of visualization. We were given the freedom to create an impression of the Vivo City mall -- and not to really follow the architectural detail to the dot. And the final image would be "muted" in a monochromatic tone as to help focus the view to the model in the foreground later.
This project also brought me back closer to my "Architectural" roots. I basically was given a rough sketch and plan. Then from there, I would design and "build" it in 3D. There are about 7 posters or so that we got to work on. But, I figured I'd just show this one.


Modeled and rendered in 3Ds Max 8.0 with Vray.
Brief scene description:
One Direct light from above, thru the skylight.
A few number of customized maps (photos of shopfronts) were used as textures instead of building it in 3D.
It was also more of an "artistic" call when it came to how sharp or visible the reflections were.
Of course, the final ad print would have also been handled by another DI Artist -- as for colour and image enhancement.
4.4.06
Render without Lights...(almost)
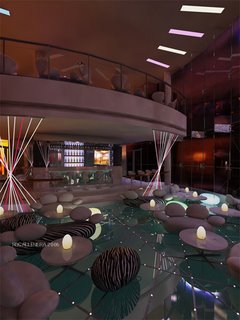
This pass is basically using most of the GI settings and environment to light up the place. No lights were place just yet. The supposedly light fixtures were simply made with self-illuminating materials.
My post-processed image. I simply adjusted the curves, and enhanced the colours by a number of Layers in Photoshop...either by adding photo filters and mixing up with soft light effects and blurring. Other details were also added, such as the wine bottles by the bar and painting some of the specular reflections.


