1.12.06

Finding the "Perfect" view

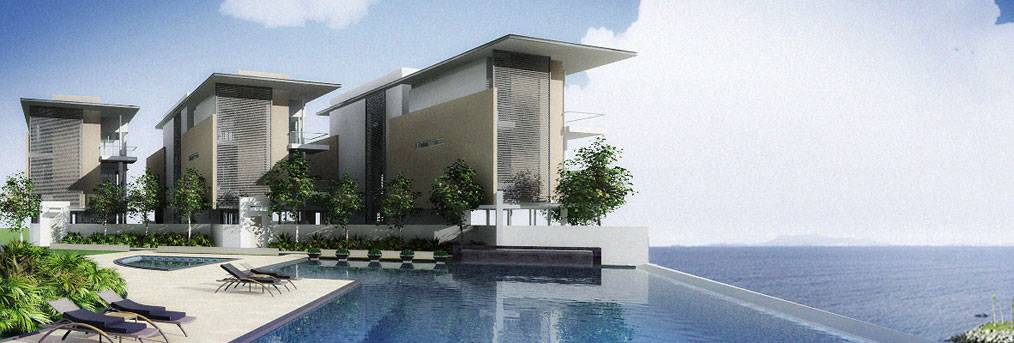
I guess it's just one of those days. This project partly involved a shot of three villas by the pool. The tricky part was to find a appealing shot that could showcase the architecture, and at the same time really focus on the three structures.

First shot, is rather composed in a way wherein the subject was about two-thirds in frame. And the horizon was just about 1/3 down. (Following the "rule" of 3rds.) Of course, I also had to make sure to give that 3-dimensional effect by at least showing two sides of the structures. And since it was a development to showcase, I figured to show some of the pool area as well.


Second shot, was approached as to make the structures really come at the viewer. To achieve this effect was to really use a virtually wide angle lens and get as close as possible to the subject. And I thought it would be nice to really give the feeling, as if one were viewing it from inside the pool. However, the drawback of this shot was that it created some "clutter" where by the lower-left side of the image where the chair and plants converge.

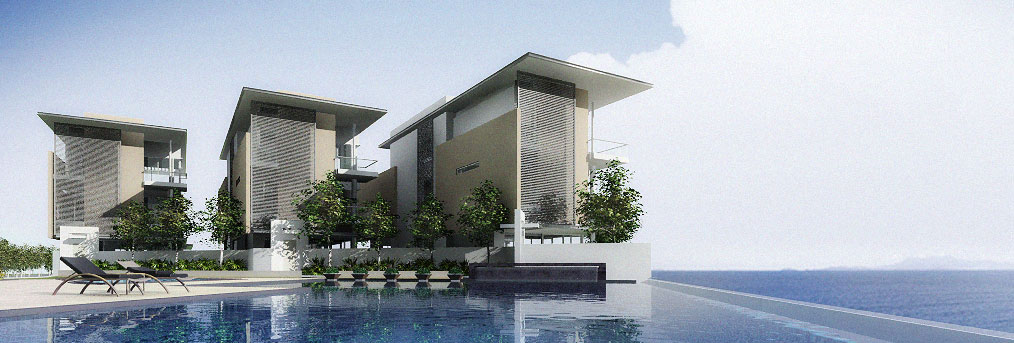
Personally, I preferred the 2nd shot. And I think, I could remove this "clutter" by adjusting the chairs and plants. But alas, this shot was rather "controversial." And to consider it artistic is subjective indeed. In the end, the client (like the majority) was more comfortable, and was drawn to the 1st shot. Nevertheless, I was satisfied that it took really sometime for some to consider the "best" image.


...so, the moral of the story is "you win some....you lose some." But at least dare to do the unusual, because "safe" can sometimes be "boring." (not that the 1st image was boring!)

Tech note: These images were simply "draft" renders. Lit in 3ds max, and rendered with Vray using one Direct Light. Some quick colour correction, brightness and contrast adjustment and background replacement were also done in Photoshop. -- only for "preview" purposes.

4.4.06

Render without Lights...(almost)

...it can be done. But also depending on some situations or whatever effect you may be after. In this case, I had the "luck" of using an HDRI which was available from Paul Devebec's Site.
The project (in LNS) at hand was some bar / lounging area. The design was modern and incorporated some sleek lighting fixtures, and lots of glass. And this is one type of project that required to show this concept, and yet set it in a night effect.

This pass is basically using most of the GI settings and environment to light up the place. No lights were place just yet. The supposedly light fixtures were simply made with self-illuminating materials.

After a few adjustments in the materials, I simply used an HDRI in the environment to give it the "colour." And omni lights were just placed at the egg-shaped lamps that were on the tables. It just so happens it turned out quite well, such that I did not have to place any other lights. With a few tweaking in the influence of the HDRI environment, I managed to get to this point where I felt comfortable to proceed in finishing the image in post.

My post-processed image. I simply adjusted the curves, and enhanced the colours by a number of Layers in Photoshop...either by adding photo filters and mixing up with soft light effects and blurring. Other details were also added, such as the wine bottles by the bar and painting some of the specular reflections.
One thing I noted was that it took some time to render this thing. And once, I had it rendered to a very hi-res resolution, splotches and unwanted colour spills became evident (as I think) due to the "low-res" HDRI. It disappeared actually, once I got rid of the HDRI, but of course I lost the coloured effect. So for an upcoming animation, I tried to recreate this coloured effect by adding 3d physical lights in the scene. At least now I had a clear visual reference. And It rendered faster.